Monday, February 17, 2014

My Most Popular Post Challenge

I was challenged to repeat a post of mine that received the most views and to mention the number of views it received. My most viewed post was from my Anniversary mini album that I posted in September for the Flamingo Scraps Blog. It received a total of 144 views. Thanks everyone!! I have included this post from September 24, 2013 below. Now, I am going to challenge Cathy Derouche to post her most popular post!


                                Happy Anniversary To Me

It's hard to believe, but tomorrow I will be married for thirty-seven years. Thirty-seven wonderful years with my one and only. I met Rick when we both worked at JC Penney. Honest to God, the very first time I saw him, I told one of my friends, that also worked there, that he would be my future husband. Rick would come over to my department at the end of the evening and make small talk . One day he hung around after we closed and said "When are you going to go out with me?" and I responded "When are you going to ask me?" We had our first date the end of January, he asked me to marry him in May, and we married in September. I have had the most wonderful, blessed life with Rick. Looking back we both say our early years with raising our kids and making ends meet, were some of our best days and happiest moments. I found a sign and we have it hanging in our living room. "If I had my life to do all over again, I would meet you sooner, so I could love you longer" 
 
When I saw the Echo Park "Beautiful Life" paper collection in the Flamingo Scraps online store, I knew I wanted to make a small mini album for our upcoming anniversary. I wanted to keep it simple with lot's of room for pictures and journaling. I started with a 12" x 12" piece of designer paper and cut it down to 9.25" x 11". On the 9.25" width I scored it at 2.50" and 6.75". On the 11" width it is scored at 5/8", 7", and 7.75". After trimming away both two opposite ends on the 5/8" score line and removing both sides starting at the 7" score line to the ends, I rounded the corners of both opposite flaps and folded the center section together using the scored lines, and then brought the 5/8" tab up pressing firmly after applying adhesive.
 
 
The liners for the outside and inside cover measured 4" x 1/2", 3" x 4", and 4" x 6 1/8". 


For my inside pages I used the coordinating solid card stock measuring 12" x 12".  I trimmed five of these to 7" x 9.25" and then scored them on the 9.25" width 2.50", and 6.75". On the 7" width at the 5/8". My liners measured 4" x 6 1/8" and followed the same instructions as the cover.


 Once assembled I used a 1 3/8" circle punch and cut a half circle out from each page for each 4" x 6" mat that was inserted into each pocket.


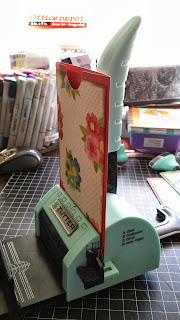
I inked the edges on all of the liners and mats. On each mat I used a small double hole punch and tied a bow using several pieces from the seam binding sampler. I used my Bind It All and bound the mini with a brown coil.
 

I used the plentiful supply of coordinating stickers to decorate the mini using mounting tape and then one magnetic closure for the cover.


This was a very easy, non fussy, non complicated, but sweet album to make. The papers were so pretty that other than inking the edges using my favorite PrimaDark Rust chalk ink, seam binding, coordinating stickers, Heidi Swapp Banners, and the Fancy Pants Cork Hearts, the paper collection spoke for itself.
 
I hope you have enjoyed visiting my blog today. While you are here, I would also love for you to subscribe by email. Also I would love for you to follow the Flamingo Scraps Blog here, to like their Facebook page click here, or if you are interested in buying this paper collection, or anything I used to make this mini, you can find ithere in the store.
 
HAPPY SCRAPPIN!
 

Thursday, February 13, 2014

Valentine Card

Last night I was going through my blog, intent on cleaning things up. Earlier I found a couple blog entries that were pending to be posted. One of them was for the Cuttin and Stampin Design Team I was on in 2013. I found this cute Valentine card I created in December. It was made using the "Love Struck" Paper Smooches Stamp set. You can buy these stamps and other scrapping items here in the Cuttin and Stampin online store. My card base is my favorite, a top fold card using "Naturals White" card stock from Stampin Up and VersaFine Onyx Black from Tsukineko, my favorite go to black ink for stamping. Enjoy!!


Happy Scrappin.............Cheryl


Wednesday, February 12, 2014

George's Penguin Valentine Card Box

Okay...two Valentine Card Boxes are now history. One for Madison and another for George. So sad that Alex's school no longer have Holiday parties. These young years pass way too fast. Who would think I have a thirty four and thirty year old? Where have the years gone? With George's box, it was done the same way as Madison's. I covered a garbage bag box I was given with black paper and went from there. I am not sure which one I like better the Penguin or the Owl. You can see the Owl here on my blog in an earlier post. Enjoy!


Happy Scrappin.........Cheryl


Monday, February 10, 2014

Madison's Valentine Card Box

My daughter brought over a shoe box this weekend and asked that I make my five year old Grand, Madison a Valentine Card Box for her party at school this Friday. Actually she brought over two. One was for Madison's best friend George. It has been years since I have had to make one of these, but if it involves paper, inks, and glue and I am all over it! Here is the first box I made. I am just now starting on George's. This was a lot of fun to make. I am sooo thankful and blessed to live close to my family once again. Enjoy!


I started off with a cut flowered shoe box. It was so cute already, I hate to cover it up


Added a few layers of border cut dies


Added a layer inside the box to make it all pretty for when the box was opened. Added a heart punch for the nose. I covered a foam heart with paper, cut it in half and used it for the wings with a little bling to the wings, Not sure if an owl has blue eyes or not. but this ones does. 


I totally messed up on the eye lashes. I had the box turned around for me to get to the eyes easier and never thought about the direction of the lashes and it was too late to go back and repair. Too many layers on top of the thin red wrapping paper. I would have had to totally start from scratch on the front of the box. Maybe these five and six year olds will never notice!


Added a bow and her name with some glitter alphabets and her box is finished.


Now onto box #2!! 

Happy Scrappin...........Cheryl

Sunday, February 2, 2014

Cards For My Momma

My sweet Mom is a huge card lover. She can spend hours in the Hallmark store looking through dozens of cards and reading each one until she finds the very one meant for her. I am trying to make her a small variety of cards to have on hand so she will not have to run out to the store as often. Like many of our Mothers and Grandparents, she sends out several cards each month and several dozen around a Holiday. Here are a few I made for her today while everyone was watching the Super Bowl. I got the idea for these cards from my friend France Martin. Here is her YouTube video showing how to make these pretty cards. Enjoy!


Happy Stampin..........Cheryl


Thinking of You Card

Today I am posting a card that I created late last night when I should have long been in bed. It's crazy how your mind picks the oddest ...